Tag Archive | KissKissHeart

Embellish, Embellish

Ever since I did my first shabby chic furniture course at the Vintage Dove, I have been keen to do the advanced class which goes into decorative techniques rather than just the painting.  Many times I had been signed up, only to hear the course was cancelled due to lack of interest.  Finally I got on the advanced course at Paloma in Rochester last October.  Rochester as I have mentioned before is my favourite place and what makes it so are Kiss Kiss Heart, Rocket and Paloma – three shops all run by the same people.  Ruth at Paloma, is trained by Annie Sloan and runs the courses at Rocket in Rochester.  Annie Sloan brought out a range of chalk paints in 1990 and has gone on to write many books on decorative techniques.  The Telegraph describes her as one of ‘Britain’s most influential female designers’.

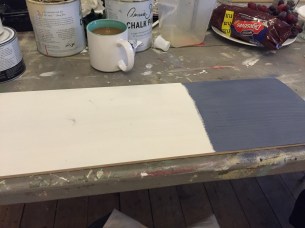
We started with a blank plank of wood and painted a third of it in a colour of our choice, I chose Old Violet, and the rest white.

img_3229

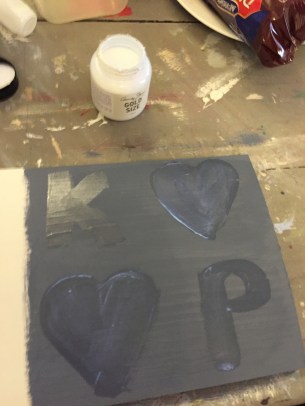
The first technique we were shown was gilding.  We painted Gold Size onto the coloured part of the board.  I chose to create letters and hearts with it but we could have just covered the whole section in it.  We could then try gold, copper or silver transfers or leaf.  I used the silver transfers for my letters and hearts and then added more gold size to form a border and applied copper leaf to this.  I found the transfers much easier to use although the leaf gave a better vintage effect.

IMG_3231.jpg

IMG_3235.jpg

The next technique was decoupage.  This was the technique I was most interested in and why I was so keen to take the course.  Decoupage involves cutting out medium (usually paper) and pasting onto an object before covering with a lacquer or varnish and the name comes from the French word, decouper which means to cut out.  It is thought that the craft originated in East Siberia where tombs were decorated with cut out felt.

Annie Sloan Decoupage is a water based glue and varnish.  We painted it onto the wood in the area we wished to apply the image to.  We cut our image out from wrapping paper and then pressed it onto the wood.  We then built up layers as a varnish over the top.  It needs about 5 coats to properly seal it and you need to allow 20-30mins between each coat.  You can get images from anything to use for decoupage – old pages from books or cards for example.  Ruth also showed us an option with napkins though which was very effective.

IMG_3244.JPG

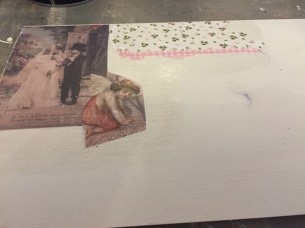
Image transfer is another popular technique and there are some great websites out there to download images from, particularly ‘The Graphics Fairy’.  Images need to be printed out on a laser jet printer rather than an ink jet as the ink needs to resist water. The front of the image is painted with Decoupage medium and then placed face down on the board.  Once the glue has dried, use a sponge to put a small amount of water over the back of the image and then rub away the paper with your finger.  Remember that if you are image transferring text – it will need to be in reverse to start with in order for it to come out the correct way around.

IMG_3252.jpg

IMG_3254.jpg

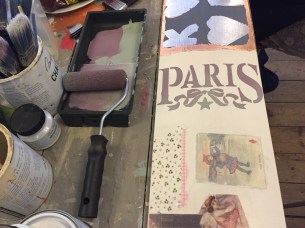
Stencilling was the fourth technique we were shown.  Paint can be put on with a roller or a stipple brush and you can also mix paints as I did.

img_3262

Finally we were shown the craqueleur effect.  Annie Sloan Craqueleur is a two-step process.  Once you have covered the area with step one and allowed it to dry; you then paint over step one with step two.  You can vary the size of the cracks according to how thick you put step two on – the thicker it is, the bigger the cracks.  To really enhance the craqueleur effect you can then apply dark wax over the top.

IMG_3274.JPG

This course cost £75 and was great value and a fantastic way to spend a Saturday morning, I highly recommend it and it inspired me to transform some more furniture using shabby chic techniques.

My mum gave me an old pine dresser which had seen better days.  I transformed the top half and then fixed it to the wall as a shelving unit to display some of my china.  I began by sugar soaping the dresser to ensure any dust or dirt was removed.  I then painted two coats of Annie Sloan chalk paint in Paris Grey.  To make the piece more interesting and add a further vintage angle to it, I purchased a chic moulding from The Vintage Dove, Rainham and glued it to the top part of the dresser after the first coat of paint and then covered it on the second.  Finally I had a mirror cut to fit between the middle shelves.  The unit was finished off by applying clear wax.

dresser2

Over the Christmas break, I decided to transform a plain white Ikea chair using Decoupage.  I purchased a book of old maps in a little shop in Holt, Norfolk.  To enhance the effect I also used some vintage map stickers which I purchased in Paloma, Rochester.

chair2

The old saying ‘one persons junk is another ones treasure’ really is so true.  There are no end to the transformations you can perform on furniture and it is a great way to make your home furnishings truly unique.  So what you waiting for – get yourself on a course and then let your imagination run wild.


Ruby Romance

In May this year my parents celebrated 40 years of marriage which is an incredible 14600 days of matrimony. From that wonderful union they have 2 children and 2 grandchildren and they still love each other as much as they did on their wedding day. My brother and I clubbed together and bought them a garden companion seat with a celebratory plaque.

IMG_0806

Sitting on their celebratory bench

What an achievement 40 years is in this day and age where people are all too quick to file for divorce. Marriage isn’t easy and has to be worked at but my parents are testament to it being possible for love to last a lifetime.

How different the world was in 1976 when they married. Technology which we now take for granted was in its absolute infancy. Can you imagine a time when you couldn’t just google the answer to any question that popped into your head and you had to wait in at home if you were expecting someone to call you? 1976 saw Ford release the first Fiesta which was to become in 2014 the UK’s bestselling car, Concorde did its first commercial flight, England won Eurovision and number 1 the week of my parents’ marriage was ‘Silly Love Songs’ by Wings.

Traditionally the 40th wedding anniversary is referred to as the Ruby anniversary. This association is because the ruby is believed to have an eternal inner flame which glows brighter each year just like the passion and love in a marriage.

My parents decided this landmark was worthy of a big celebration so my Mum and I set about planning an event akin to a small wedding reception. Dinner was held at a golf club for family and friends with a DJ after. We decided on a theme of travel which may seem ironic to those of you who know my Dad well as he hates holidays. However I thought the travel theme was appropriate in more of a metaphorical way because of the journey they have made together through 40 years of marriage.

An old suitcase was used for the table plan and we hung a luggage tag for each table’s guests inside. Each table was named after somewhere my parents had visited together – thank goodness we didn’t have more than 5 tables or we would have been stuck on locations with their limited holidays! The table name was stuck on a cut out of a suitcase and a photo of them in the place put on the back. Place name cards featured a suitcase logo. The centre piece of each table was a single red rose – a symbol used to denote total devotion to one person.

IMG_0821

IMG_0298


IMG_0828

I made up favours for the tables which were love hearts in a ruby coloured organza bag and I made a cake for them with a photo of them cutting their wedding cake on the top.

IMG_0819

For the event I wore a dress from Coast, similar to the style of my bridesmaid’s dress at my wedding and reddish/pink in colour to tie in with the ruby theme. I accessorized with some silver diamanté sandals which I got in John Lewis when I was a bridesmaid at my friend’s wedding (see I do wear some shoes more than once!) I also had this gorgeous fan shaped metal clutch with a 1920’s art deco feel to it. I got this from Vintage Styler.  I added a red butterfly clip in my hair.

IMG_0802


IMG_0908

At the entrance Mum decorated a small table with old photos from the day, decorations from the wedding cake, along with her garter, which was her something blue, blue being seen as a colour representative of constancy and loyalty; and other trinkets hooked over her arm on the day including a horse shoe and a rolling pin. The rolling pin would have been seen as something useful to give a wife so she could make meals for her husband (often a wooden spoon traditionally rather than a rolling pin) and a horseshoe for good luck going back to the 10th century when horseshoes were used to mark the door of Christians thus protecting them from the devil. Many wedding customs are the same today although the gifts hooked over a brides arm are not so common nowadays – I know I didn’t receive any at my wedding.

IMG_0836

My Dad gave a wonderful speech which detailed how they met as a blind date and how he had always loved her and the speech ended with him presenting her with a ruby ring. I also gave a short speech which included a poem which my uncle composed music to and sang at the wedding but unfortunately he was unable to make the party for a second performance of it. The poem is called ‘The Life that I Have’ and was originally written by Leo Marks in 1943 for his girlfriend who had recently been killed in a plane crash. It was used as Poem code during the Second World War. It was common for secret messages to be passed using a poem as code but was proving unreliable as the enemy could find the original source of the poem – Marks got around this by using his own creations. The poem was famously used in the film ‘Carve her Name with Pride’.

A fantastic evening was had by all and it was beautiful to see Mum and Dad dance once again to their first song from their wedding ‘I’d like to teach the world to sing.’

The month of May also saw my husband and I celebrate our second wedding anniversary. Cotton is the symbol given to the second anniversary symbolic of the couple becoming closer and their lives becoming more intertwined. It is also said to represent the couple learning to be flexible and adapt to each other’s needs as cotton is both strong and soft. I bought him a shirt – which he wore to Mum and Dad’s do and some cotton trousers. He bought me a cotton vintage quilt I had fallen in love with from the shop Kiss Kiss Heart in Rochester. We celebrated with a trip to Port Lympne Safari park (one of our early dates) and a curry in a new Indian restaurant in Rainham.

Quilt

My gorgeous quilt

Two years has flown by and I’m sure the next 38 will too. I hope we can be as happy at 40 years as my Mum and Dad obviously are.

40th joint pic